Friday, September 14, 2012

Pintember: Veggie/Quinoa Burgers


I have really been wanting to try to make veggie burgers for so long! Seeing them all over Pinterest only piqued my interest even more (no pun intended). But none of the ingredient lists quite intrigued me enough to make the recipes on the pins. But 2 different ones inspired me to create my own...


and...


After I made them I asked both Picky One and his friend if they wanted them for lunch. They both said, "Sure." Picky One ate one, but, amazingly...the whole thing not just a taste and then ask, "What else can I have?" His friend Carm actually had 2. Hey if 2 young teen boys liked them they had to be good right? I also gave them to my neighborhood gluten free buddy. She liked them too...But not quite as much as those cheesy quinoa pancakes I made a few days before. My other 2 didn't even try them. I had my lunch and froze the rest with wax paper in between. (I just had a frozen one yesterday and all I had to do was break one off and nuke it. It was just as good as the day I first made them)

Now it's funny...most of the veggie burger recipes out there have very little protein in them. I thought that was the point of a burger?! And well, since I had cooked waaay too much quinoa the other day, I had plenty to use up. Good! I wanted to get some protein into my burgers.

Also I had noticed that the ones that called for sweet potatoes had you peeling them first and then shredding...isn't it much healthier to leave the peel on? Hmm...Who wrote these recipes?

Anyway...Here is what I came up with... (and yes, the picture is blurry again...I'm working on it!)


Mixed Veggie/Quinoa Burgers


1-15 oz can of Garbanzo beans, mashed
1-2 T olive oil 
1-2 T lemon juice
I cup spinach (I used chopped frozen and defrosted, it's what I had on hand)
1 small sweet potato, grated with skin on (1 1/2-2 cups)
1/2 red bell pepper, shredded (probably any color but green would work)
1/4 cup sweet onion, shredded or finely chopped (I used Vidalia)
2 eggs, beaten
2 T gluten free Bisquick (I would think that any type of flour would work)
1 T minced garlic
2 cup cooked quinoa
1/4 t powdered ginger
1 t cumin powder
salt and pepper to taste

Mash beans with olive oil and lemon juice in large mixing bowl to make a paste. Add the rest of the ingredients to bowl. Mix until ingredients are well combined. Refrigerate for 10 minutes. Make 1/3 cup patties. Cook covered over medium heat in olive oil for about 4 minutes on each side, adjusting for the heat of your stove/pan. Be gentle when flipping them. Serve as is or on a bun. Enjoy without the guilt of a real burger but still with a lot of flavor!


Wednesday, September 12, 2012

Pintember: Cheesy Quinoa Cakes

This was a great little protein packed side dish!


Sorry...I do not have any pictures of mine. I never checked my pictures. And when I just looked for them, they were all really blurry! I guess I will be working on taking pictures, as my buddy suggested with a month of picture taking...in the future.

Most side dishes have little to no protein. this one on the other hand has the idea of  potato latkes but are made with healthy quinoa instead...so therefore...have a bunch of protein!

My hubby and the Picky One do not eat quinoa. They can't stand the texture! But they both liked these! This recipe does not make many pancakes so they each only tasted them and left them for me to eat. I can't remember what the other kid thought of them but how could he not like them?  (I made them a while ago) He actually loves quinoa. So he must have loved these. Also, since I made them gluten free I gave some to my friend/neighbor who has Celiac's Disease. (We usually share gluten free things that are new/different...or just sweet.) She said they were really good. A few days later she said she still had them on her mind...They must have been really, really good! I wonder if she ever made them herself?...Carrie? Did you?

I did end up tweaking the recipe a little from the start (I didn't have or didn't want to spend the money) and I also made a change after the first small batch ('cuz things weren't quite right)...


Cheesy Quinoa Cakes
(Makes 10 to 12 small pancakes)
2 cups cooked quinoa
2/3 cup grated swiss cheese
3 tablespoons Gluten Free Bisquick (you could probably use any gf or regular flour)
2 sweet onions,finely chopped (I used Vidalia)
2 eggs, beaten (lots of recipes call for lightly beaten, I always beat well)
1/2 teaspoon freshly ground black pepper
salt to taste
olive oil cooking spray 
1. Place all ingredients into a mixing bowl and stir together until well combined. Season with salt and allow the mixture to sit for 5 minutes.
2. Spray large saute/fry pan with cooking oil spray. 
3. Form 1/3 cup patties with the quinoa mixture and place in the heated sauté pan. (This will have to be done in batches.)
4. Cook quinoa cakes for about 5 minutes on each side. Repeat with the remaining patties until all of the cakes have been cooked. 
5. I served mine with applesauce, since that is a standard potato latkes thing.
6. ENJOY!


Also...When I cooked the quinoa in preparation for this recipe...I messed up! I made waaay too much. So, tomorrow I will post the other recipe I made/created with some of the extra.


Tuesday, September 11, 2012

Pintember: Banana Crepes

I had such I sweet tooth in the morning, so I decided to try these for breakfast...


They were very good! But I have decided that when I would try it again I would probably add a tablespoon or 2 of gluten free flour. It was just missing a little substance.

My "Picky One" loved it, believe it or not! A, the one that eats most things said, "Eh..."


This is definitely an idea that I will keep, but the recipe does need to be adjusted. It is just a little too plain, for me anyway...Picky One would eat it.

All in all...a worthy pin.


Monday, September 10, 2012

Pinterest: Fabric covered storage box

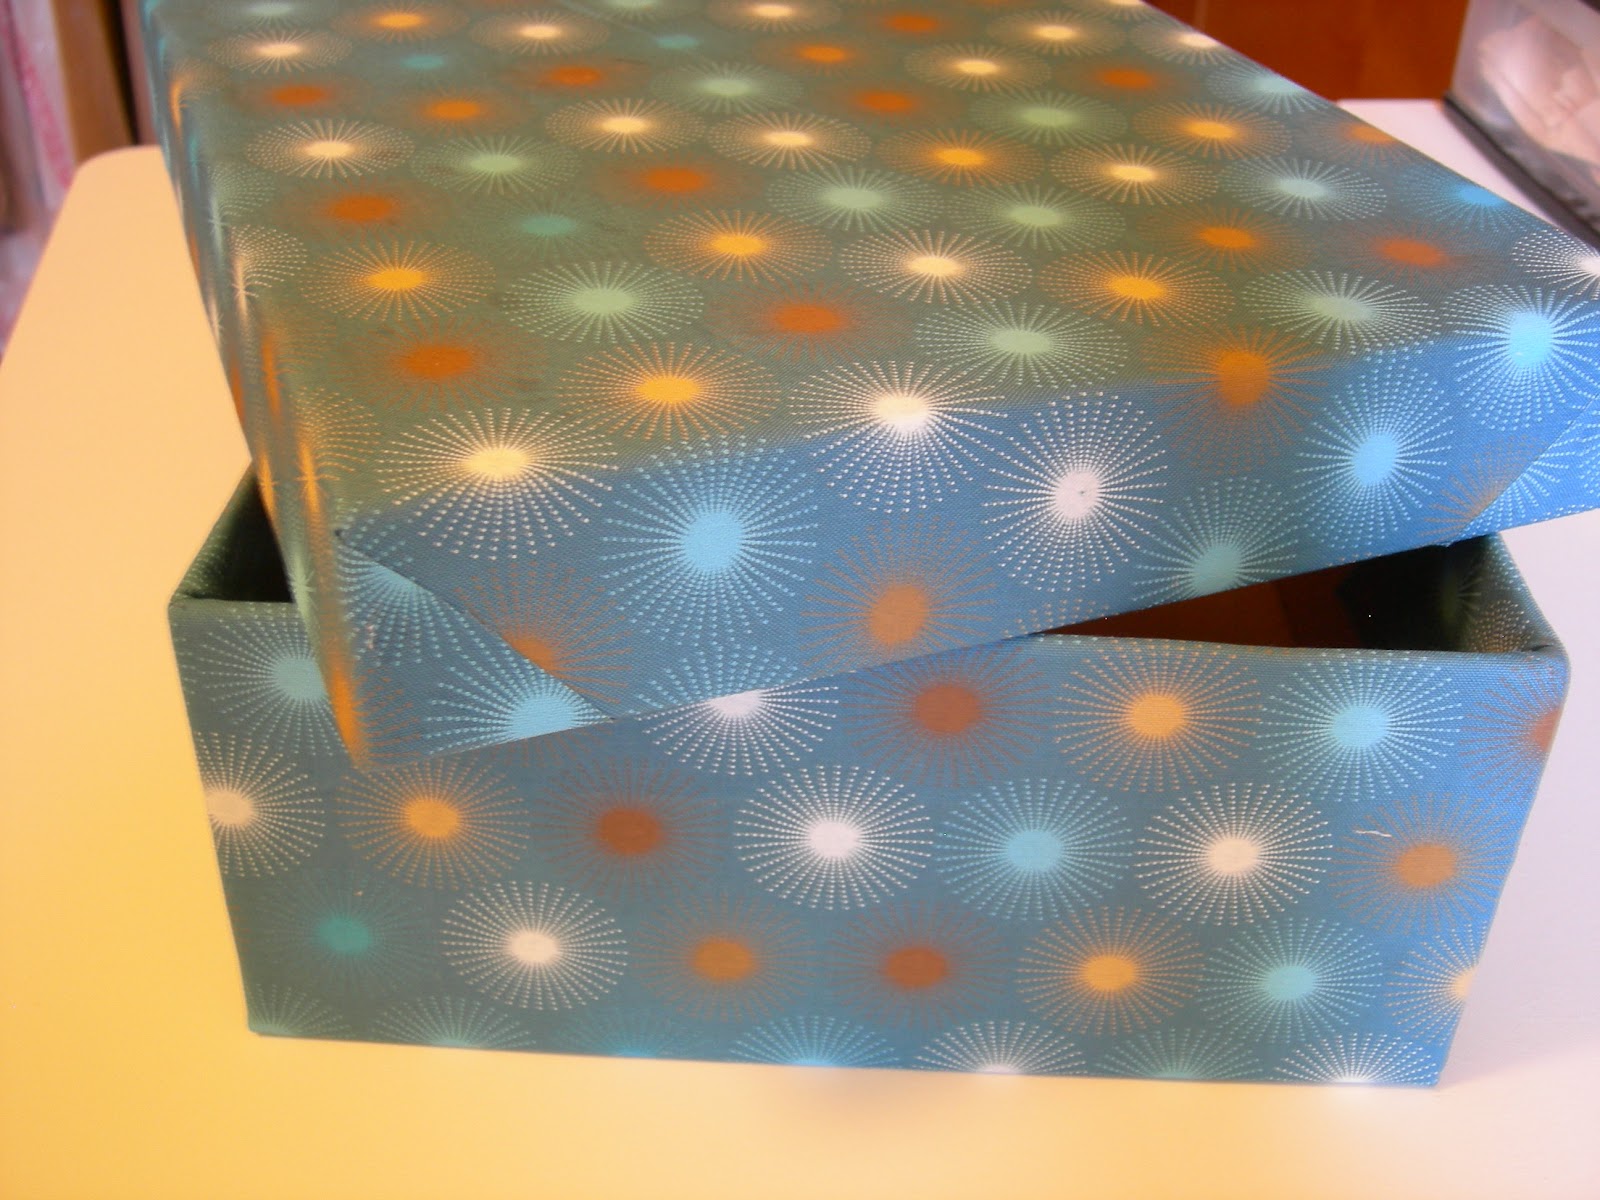
This is the end result of my project...(including my earring hanger from the other day)


 Here is the pin that inspired the box:


These are the before pictures...


And here is the box's after picture...


Nice huh? I love the fabric! Now I have someplace to put my papers and junk that I want to keep, but I'm not quite sure where it should go. It also inspired/encouraged me to put away some of the things that actually do have another home.

The tutorial suggests you use a glue stick. I used fabric glue. I love that stuff! I use it on everything! The tute also shows you only covering the sides with the fabric and then bottom with felt. I covered the entire box with my special fabric. I wanted the whole thing to be pretty. 

As you know...the shoe box was free. This particular fabric happened to be on the clearance table at Hobby Lobby for $4 a yard (and I only needed half of it). I think I might be covering a round oatmeal container to put my receipts in so that I can keep them separate from the magazine articles I want to save. It also matches both my summer bed covering and my winter quilt. Pretty amazing! And thanks to my friend Angela that found it and suggested it in the first place!

Once again...Another great pin!


Sunday, September 9, 2012

Pintember: New York Style Cheese Cake

My 12 Year old is turning another year older!

Even though I knew that we wouldn't be home for his birthday, I asked him what kind of cake he wanted. He had no idea. So I suggested an ice cream cake. I told him I would make him one. He thought that was a good idea.

Then a few weeks later...I thought...maybe...New York Style cheese cake...

Then D raved! "That is my favorite dessert!"

So I searched Pinterest...

I used the cheese part of the recipe from here:


And the crust part from here (I like lots of crust!):


And I put it in the largest Springform pan I own...a 10 inch.

Here is the what was left of mine after the birthday celebration...A few of us had 2 pieces. It was so good!


So much for me staying low sugar and gluten free!

And the boys each had another piece of it for dessert last night (and I saved 3 individually wrapped pieces in the freezer for another day)...YUM!

Saturday, September 8, 2012

Pintember: Jewelry Hanger

I changed up this one a little bit. Here Is the pin that inspired me to clean up part of my mess...


Here is the problem...


In that mess there are:

3 rings
1 bracelet
1 anklet
1 watch
13 pairs of post earrings
and...
5 pairs of hook earrings!!!

What a mess! All within a 4" circle! 

Every time I want something from the tiny dish I need to dump it on my bed!

And the worst part is that there are more that I would like to have easily accessible too...

So here it goes...

I will be taking  3 different sizes of embroidery hoops and filling it with a light   colored crinoline, since I'm not a lace type of girl. It's a color that matches the fabric from a future project to be done this month.


Sorry, the pictures are a little blurry. But I think you have the idea. Just so you know...I put all of my real earrings on the small ring that can be popped into my night stand in case workers or someone else are coming in the house. I also hung each ring up with just an ordinary straight pin. I have been told that they can hold up to 5 pounds each. I'm pretty sure my earrings will be safe on them!

And did you notice? There is space for plenty more!

And it only came to $4.76 plus tax! Without coupons! Thanks Hobby Lobby!

Definitely a great pin!

Friday, September 7, 2012

Pintember: Infinity scarves

Thanks to having the rest of the t-shirt leftover from yesterday's project...I could make today's...

Kinda...anyway...


I have been wanting an infinity scarf for a while now. But I'm waaay too cheap to fork up $40 bucks for one!

But I don't dye things. It's just too messy! Maybe I'll get up the guts to do it one day...

But in the mean time...I made these...They'll do just fine!

You can wear them each individually. Like these...


Or all together. Like this...


This is the most simple way to make a scarf. Make sure you have a t-shirt with no side seams. And S-T-R-E-T-C-H!

And...DONE!